Dealing with a leak in your refrigerator’s water line can be a daunting task. However, with the right tools and a bit of know-how, you can easily repair a refrigerator water line leak yourself. This comprehensive guide will walk you through the steps to diagnose, repair, and prevent leaks in your refrigerator’s water line. Whether you’re a seasoned DIYer or new to home repairs, this guide will equip you with the knowledge to tackle this common household issue.
Identifying the Leak in Your Refrigerator Water Line
Signs of a Water Line Leak
The first step in any repair is to identify the problem. In the case of a refrigerator water line leak, you might notice puddles of water near your refrigerator, hear the sound of water dripping or flowing when it shouldn’t be, or see an unexplained increase in your water bill. These signs indicate that it’s time to inspect your refrigerator for leaks.
Locating the Source of the Leak
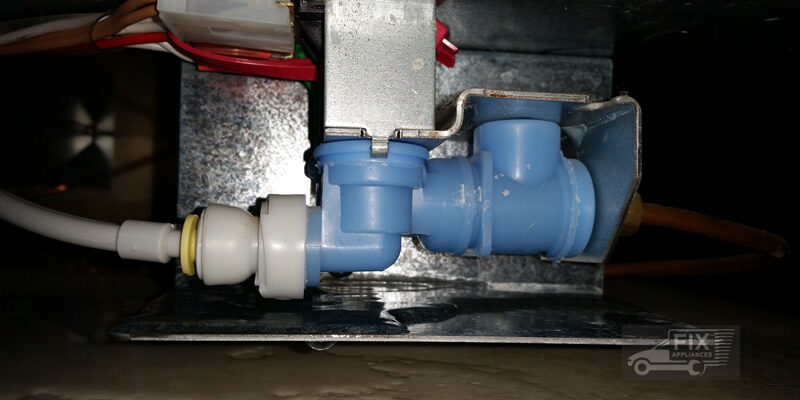
Once you’ve confirmed there’s a leak, the next step is to find where it’s coming from. Check the water inlet valve, the water line fittings, and the connections to the water filter. Often, leaks occur at joints or in areas where the tubing has become brittle or damaged.
Safety Precautions Before Starting Repairs
Before you begin any repairs, it’s crucial to take the proper safety precautions. Unplug your refrigerator to avoid any electrical hazards and turn off the water supply to stop the flow of water. Ensure you have protective gear, such as gloves and safety glasses, to protect yourself during the repair process.
Tools and Materials Needed for Repair
Essential Tools for the Job
Repairing a refrigerator water line leak requires some basic tools. Have an adjustable wrench, a bucket or towel to catch any dripping water, and a utility knife or tubing cutter on hand before you start the repair.
Replacement Parts and Materials
Depending on the nature of the leak, you may need replacement tubing or connectors. It’s also a good idea to have Teflon tape for sealing connections and a water line repair kit specific to your refrigerator model.
Organizing Your Workspace
Clear the area around your refrigerator to create a safe, efficient workspace. Make sure you have good lighting to see the parts you’re working on and keep your tools and materials within easy reach.
Shutting Off the Water Supply
Locating the Refrigerator Water Shut-off Valve
The water shut-off valve for your refrigerator is typically located behind the fridge or under the kitchen sink. In some homes, it may be in the basement or utility area. Finding and correctly identifying this valve is crucial for the next steps.
How to Properly Shut Off the Valve
To stop the flow of water to your refrigerator, turn the shut-off valve clockwise until it’s fully closed. Check to ensure that water has stopped flowing to the appliance before proceeding.
Draining the Remaining Water from the Line
Even after the water supply is off, some water will remain in the line. Place a bucket or towel under the water line to catch any spills as you relieve the pressure and drain the remaining water.
Removing the Damaged Section of the Water Line
Identifying the Damaged Section
Before making any repairs, it’s crucial to pinpoint the exact location of the damage. Carefully inspect the water line for any visible cracks, holes, or signs of wear and tear. Sometimes, the damage might not be immediately apparent, so feel along the line for any dampness that could indicate a leak.
Cutting Out the Damaged Section
Once you’ve located the damaged section, use a utility knife or a tubing cutter to remove it. Aim for clean, straight cuts to make the repair process smoother. It’s essential to cut out all the damaged parts to prevent future leaks.
Preparing the Ends for a New Connection
After removing the damaged section, prepare the ends of the water line for the new connection. Use a file or sandpaper to smooth any rough edges, ensuring a tight fit with the new piece. Make sure the ends are clean and dry to help secure the connection.
Installing the New Water Line Section
Choosing the Right Replacement Tubing
Selecting the correct type of replacement tubing is critical. Ensure the new piece matches the original line’s diameter and material to avoid compatibility issues. Also, consider the length of the tubing needed to span the gap without stretching or kinking, which could lead to future leaks.
Connecting the New Section
For connecting the new section, you have a few options, including push-to-connect fittings or compression fittings, depending on your refrigerator model and the type of tubing used. Apply Teflon tape to the threads of any fittings to ensure a watertight seal. Carefully connect the new tubing section, following any specific instructions included with your repair kit or fittings.
Checking for Leaks at the New Connections
With the new section installed, it’s time to test your work. Turn the water supply back on slightly and check the new connections for leaks. If you notice any drips, tighten the fittings slightly but be careful not to overtighten, as this can damage the connections.
Reattaching the Water Line to the Refrigerator
Connecting to the Water Inlet Valve
Carefully reattach the water line to the refrigerator’s water inlet valve. Use an adjustable wrench to tighten the connection, ensuring it’s secure but not overly tight, which could strip the threads or damage the valve.
Restoring Power and Water to the Refrigerator
Once the water line is securely connected, plug your refrigerator back in and turn the water shut-off valve back to the open position, restoring the water supply to the appliance.
Testing the Repair
To ensure the repair was successful, test the refrigerator’s water dispenser. Dispense water for several minutes to check for leaks and to purge air from the line. If everything appears to be working correctly and there are no signs of leaks, congratulations! You’ve successfully repaired your refrigerator water line leak.
Preventing Future Water Line Leaks
Regular Maintenance Tips
To prevent future leaks, it’s a good idea to inspect your refrigerator’s water line periodically for signs of wear and tear. Replace the water filter according to the manufacturer’s recommendations to maintain water quality and pressure.
Avoiding Common Causes of Damage
Be mindful of the water line’s position to prevent kinks and bends, which can lead to damage. Also, ensure your home’s water pressure is within the range recommended for your refrigerator to avoid stress on the water line.
When to Consult a Professional
If, after your repair, you still notice leaks or if the issue seems more complicated than anticipated, don’t hesitate to consult a professional. Sometimes, leaks can be symptomatic of a larger problem that requires expert attention.
Frequently Asked Questions (FAQs)
Why does my refrigerator water line keep leaking?
There could be several reasons why your refrigerator water line continues to leak after a repair. It’s possible that the initial repair didn’t fully resolve the issue, or a new leak has developed in a different part of the water line. Common causes include damaged or worn-out tubing, improper connections, or issues with the refrigerator’s water inlet valve. Regular inspections and maintenance can help prevent leaks from recurring.
Can I repair the water line without replacing it?
In some cases, it might be possible to repair a refrigerator water line without completely replacing it. If the leak is small and located at a connection point, tightening the connection or applying the plumber’s tape might resolve the issue. However, if the tubing is damaged or worn out, replacement is often the most effective solution to ensure a long-term fix.
How often should I replace my refrigerator water line?
The lifespan of a refrigerator water line depends on various factors, including the material of the tubing, water quality, and how well it’s maintained. As a general guideline, it’s a good idea to inspect your water line annually and consider replacing it every 5 to 7 years. If you notice any signs of wear, damage, or leaks during an inspection, replace the water line sooner to prevent water damage and ensure your refrigerator operates efficiently.
What should I do if the leak persists after repair?
If your refrigerator water line continues to leak after attempting a repair, it might be time to call in a professional. Persistent leaks could indicate a more complex issue that requires specialized tools and expertise to diagnose and fix. A professional technician can help identify the root cause of the leak and perform a reliable repair that ensures your refrigerator’s water line is leak-free.
Is it safe to repair a refrigerator water line leak myself?
Yes, it is generally safe to repair a refrigerator water line leak yourself if you follow the proper safety precautions and instructions. Ensure you turn off the water supply and unplug the refrigerator before beginning any repairs. If you’re unsure about any part of the process or if the repair involves electrical components, it’s best to consult a professional.
Can a water line leak affect my refrigerator’s performance?
A leak in the refrigerator’s water line can potentially affect the appliance’s performance, especially if it leads to water damage in electrical components or interferes with the water and ice dispenser’s operation. Addressing leaks promptly can help prevent further damage and ensure your refrigerator continues to operate efficiently.
Conclusion
Repairing a refrigerator water line leak may seem daunting, but with the right tools and a step-by-step approach, it’s a manageable task for most homeowners. By following this guide, you can save yourself the cost of a professional repair and gain the satisfaction of fixing the problem yourself. Remember, regular maintenance and being mindful of your appliance’s needs can help prevent future leaks and keep your refrigerator running smoothly.


