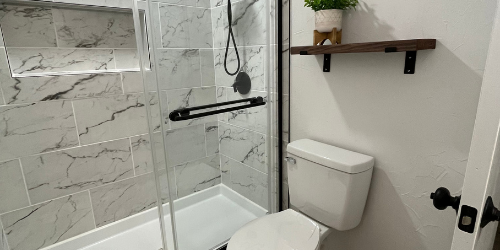
Installing a toilet may seem straightforward, but there are many small details that can affect comfort, safety, and long-term functionality. In many homes across the local area, families rely on properly installed plumbing fixtures every single day. A toilet that is set up the right way will reduce the risk of leaks, water damage, or costly repairs in the future. Taking the time to follow proven professional steps and techniques is an investment in your home’s comfort and reliability.
Key Takeaway: Proper toilet installation is not just about connecting parts—it’s about ensuring stability, preventing leaks, and creating a lasting foundation that supports your household’s everyday needs.
Preparing for the Installation
Choosing the Right Toilet
One of the first steps is selecting a toilet that fits your bathroom size and meets your family’s needs. Comfort height toilets are increasingly popular, offering ease of use for both younger and older household members. When comparing different options, consider water efficiency, bowl shape, and whether a one-piece or two-piece style is better for your space. Just like choosing durable Residential Fencing, the decision should balance style and functionality.
Gathering the Right Tools
Before starting, make sure you have everything needed on hand. A wrench, wax ring, bolts, level, and caulking materials are essential. Having the right tools ahead of time avoids interruptions and ensures each step flows smoothly. This preparation helps prevent mistakes that could otherwise cause delays or additional expense.
Checking the Flange and Flooring
The toilet flange is critical for sealing the toilet to the drainpipe. A cracked or uneven flange can lead to leaks and instability. Inspecting and replacing it if necessary is a must. Just as homeowners prepare their floors for Wood Fencing installations, a solid base sets the stage for long-lasting results in plumbing too.
The Installation Process
Positioning the Wax Ring
A fresh wax ring creates the essential watertight seal between the toilet and the flange. Carefully aligning it before lowering the toilet helps prevent misplacement. Once the toilet is seated, avoid rocking or lifting it again, as this could break the seal and create future issues.
Securing the Bolts
Once the toilet is in position, it must be bolted securely without over-tightening. Applying too much pressure can crack the porcelain base, while not tightening enough can cause wobbling. Achieving the right balance ensures the fixture remains safe and secure for years.
Connecting the Water Supply
Attaching the water supply line may seem simple, but it requires care. Checking the washers, tightening connections, and turning on the valve slowly allows you to monitor for leaks. This small step provides peace of mind and prevents water damage in your bathroom.
Post-Installation Care
Checking for Stability
After installation, sit on the toilet to test stability. If there is rocking, inserting toilet shims helps level the fixture. Small adjustments like these are essential for maintaining balance and ensuring comfort.
Testing for Leaks
Flush several times and inspect around the base and connections for any signs of leakage. Water damage can be costly, and early detection is key. A slow drip left unchecked could harm flooring, just as poorly maintained Chain Link Fencing can weaken over time without proper inspection.
Sealing the Base
Adding a bead of caulk around the base prevents water from seeping underneath, protecting your flooring. Caulking also gives a finished look to the installation, keeping the bathroom neat and polished.
Long-Term Maintenance
Preventing Clogs
Being mindful of what goes down the toilet is essential. Avoid flushing wipes, even those labeled “flushable,” as they can cause clogs in the plumbing system. Regular care saves you from inconvenient blockages.
Cleaning Properly
Use mild cleaners to avoid damaging porcelain and internal components. Harsh chemicals may wear down seals or cause discoloration. Consistent but gentle cleaning preserves both appearance and performance.
Inspecting Periodically
Every few months, check the water supply line, shut-off valve, and bolts. Just like maintaining Commercial Fencing, periodic inspections help identify issues early and extend the lifespan of your fixtures.
Answering Common Questions
How long does a toilet installation usually take? For most homeowners, installation takes about two to three hours, depending on the condition of the flange and flooring. Professionals can often complete it more quickly.
Can I install a toilet myself without professional help? Yes, with the right tools and instructions, many homeowners can complete the task. However, hiring a professional ensures peace of mind, especially if you encounter issues like damaged pipes or uneven flooring.
What should I do if my toilet rocks after installation? Toilet shims can be placed under the base to stabilize the fixture. Be sure to recheck the bolts after shimming to confirm everything is secure.
The Role of Water Efficiency in Toilet Installation
Modern toilets are designed to conserve water without sacrificing performance. Choosing high-efficiency models helps lower utility bills and supports environmental sustainability, making your home more resource-friendly.
The Connection Between Bathroom Renovations and Home Value
A properly installed toilet is one part of a larger renovation that can increase your property’s value. Just as Pipe Fencing enhances curb appeal outdoors, bathroom improvements inside the home create comfort and long-term financial benefits.
Why Professional Help Matters for Home Projects
While DIY approaches can be rewarding, some projects require expert knowledge. From plumbing installations to larger outdoor living updates like patios, kitchens, and fencing, the skilled team at Lowery Fence & Patio provides services that combine durability with beauty, ensuring your home remains a place of comfort and pride.


